


Please go trough the whole manual before starting work on your pressure washer to make sure you understand the procedure and that you have the necessary tools to complete the task.
Always unplug the pressure washer from both the mains power and the water outlet before starting the service.
Even though power and water is disconnected there may be pressurized water in the hose. Discharge this pressure by pulling the trigger on the gun.
Make sure your work area is clean and appropriate for the work you are about to do. There will usually be a small amount of water inside the pump and hose.
When you are doing a 10-year service, then be prepared to collect the used oil from the oil chamber. Please dispose of the oil in accordance with local law and regulations.
ISO 46 hydraulic oil can be substituted with similar non detergent oil of the same viscosity.
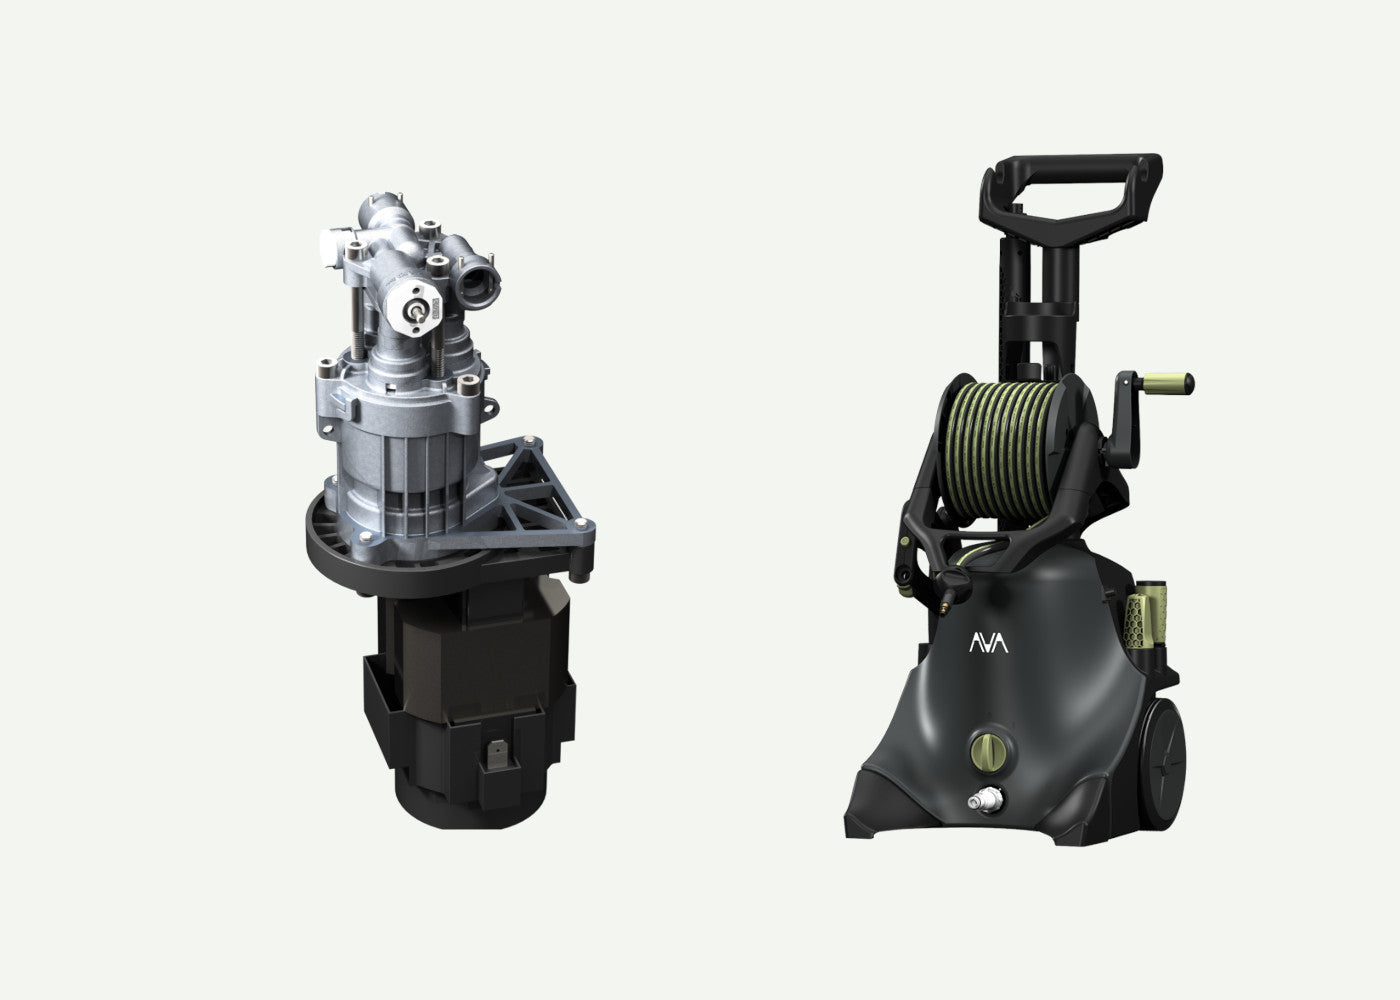
00. Parts and tools
An overview of what is needed to do this service.

01. Remove the water filter
Unscrew the water filter and remove it.

02. Remove screws
Release the short pressure hose from the pump outlet. Unscrew the six T25 screws from the back cabinet.

03. Remove the front cover
Remove the front cover. Then remove the on/off knob.

04. Remove screws
Unscrew the three T25 screws securing the motor/pump.

05. Disconnect the soft start box
Disconnect the power cable from the soft start box.

06. Remove the motor/pump
Carefully lift out the motor/pump assembly.

07. Remove inlet pipe
With the motor/pump out, remove the U-pin securing the inlet pipe. A flat head screwdriver or similar tool is useful to pry out this pin.
Then remove the inlet pipe from the pump head.

08. Remove the switch box
Remove the switch box by pulling it in the direction indicated. It is press fitted onto the start/stop valve on the pump.
Use a 5mm hex/Allen key to remove the three screws on the pump.

09. Remove the motor cowling
Remove one T25 screw from the cowling and bend the two flaps where the hooks of the lower cowling engages. Lift off the top and bottom cowling. This cowling will be reused on the new motor/pump unit.

10. Disconnect the motor power cords
Push down the small tab on the female connector while gently pulling the cable. Release both spade connectors from the motor wiring and pull them through the plastic frame.

11. Remove U-pin
Remove the U-pin securing the water outlet connector. Pull off the outlet connector.

12. Attach outlet connector
Attach the outlet connector to the new motor/pump unit. Secure it using a U-pin.

13. Connect the motor power cords
Take the two motor power cables and pull them through the plastic frame. Connect the female spade connector to the male spade connector. Give them a light tug to check that the locking tabs are properly engaged.
The order of the connection is irrelevant since the motor runs on AC power.

14. Fit motor cowling
Fit the motor/pump assembly back into the bottom motor cowling.
Once a perfect fit is achieved fit the top motor cowling. Make sure that the hocks engage the locking tabs on the bottom cowling.
Insert a T25 screw to secure the two cowlings.

15. Attach the switch box
Attach the switch box to the pump. You may need to put decent amount of pressure to get the box firmly seated on the start/stop valve. It should pop into place.

16. Attach the inlet pipe
Reattach the inlet pipe.
Secure it using a U-pin, use a small hammer or something similar to tap it into place.

17. Put the motor/pump assembly into the rear cabinet
Turn the motor/pump unit so that the switch box and water inlet is facing up and place it back into the rear cabinet.

18. Connect the power cable
Reconnect the two spade connectors to the power cable.
Put the on/off switch knob back on to the switch box.

19. Secure the motor/pump
Secure the motor/pump and the switch box using the three T25 screws.

20. Fit the front cover
Carefully fit the front cover to the back cabinet of the pressure washer.
Make sure the on/off button is properly positioned so that it can operate freely.

21. Secure the front cover
Make sure that the front and back cover is perfectly aligned. Secure the front cover using six T25 screws.
Attach the short pressure hose to the outlet connector at the back.

22. Attach water filter
Check that the filter cassette is clean, then refit the water filter.

23. First start after service
Congratulations with finishing the service of your AVA product.
It is now time to do the first start after service.
- Start by connecting the pressure gun to the hose.
- Connect water.
- Make sure no water is leaking from the inside or anywhere else on the pressure washer.
- Pull the trigger and let the water flow until there is no more air coming out.
- Connect the power cord.
- Turn on the pressure washer.
- Pull the trigger and let water run for a minute before connecting a nozzle.
- Connect the nozzle. Use the pressure washer and make sure it is operating as normal.
24. Troubleshooting
Water is leaking from the inside
- Disconnect the power and open the pressure washer to locate the leak. Take necessary action to remedy any leaks.
Motor runs and won't stop when you release the trigger
- This is most likely due to an improper seating of the switch box on the start/stop valve. Open the machine and check that the switch box is correctly seated.
The pressure washer won't turn on
- Check that the power cable is connected.
- Check that the circuit breaker has not been tripped.
- Check that the fuse in the power plug is intact (UK models only).
- Open the machine and check that all the internal cabling is connected.
Poor performance/pressure
- Improper assembly or dirt/debris in the pump. Check that the pump and especially the main valve for foreign objects/debris. Make sure that the spring in the main valve is correctly seated and working as intended.


