Step by step guide
Smart: Wheel change
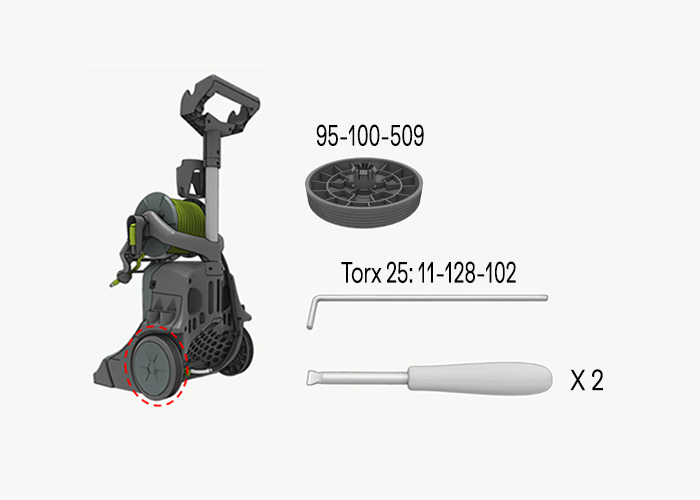
Learn how to easily replace the wheels on your Smart pressure washer with this step-by-step guide. All you need are Torx 25 and two flathead screwdrivers or similar tools. Get your pressure washer rolling smoothly again. Safety first! To prevent any accidents, ensure that your pressure washer is turned off and unplugged from its power source.
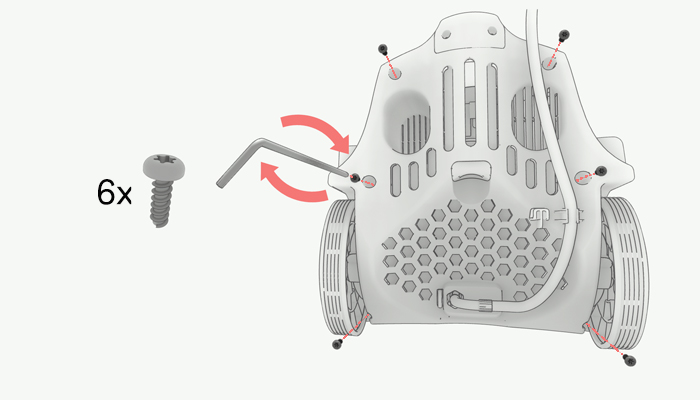
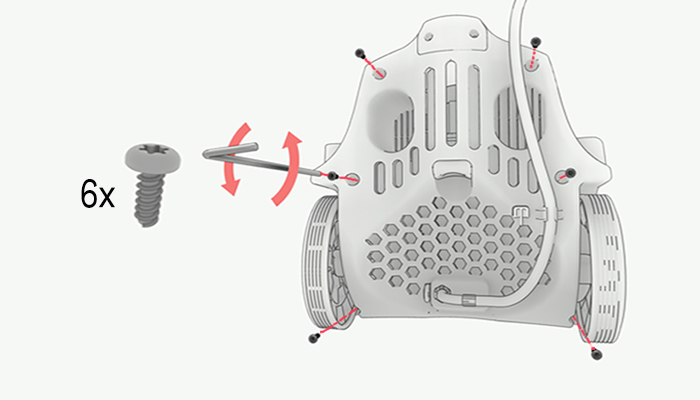
1. Remove 6 screws from back of the machine
Use Torx 25.
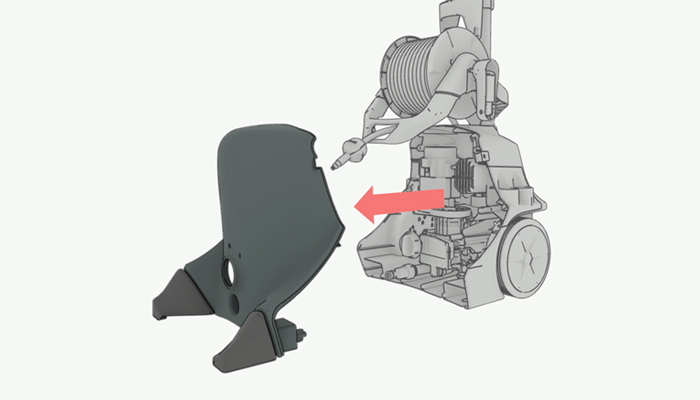
2. Remove the front cover
Use your hands to pull off the cover.
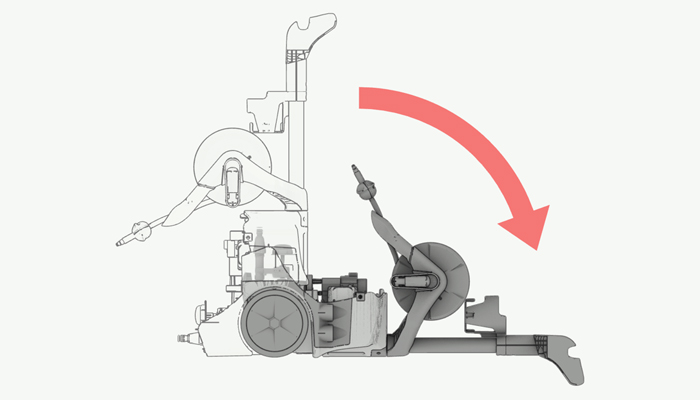
3. Lay the machine on its back
Ensure that the machine is securely and stably positioned on its back.
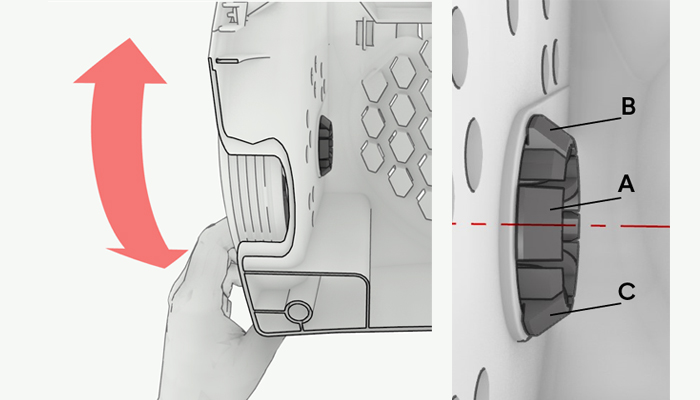
4. Adjust the wheel to the correct position
The correct position is when you can see three locking hooks from the side (A, B, C).
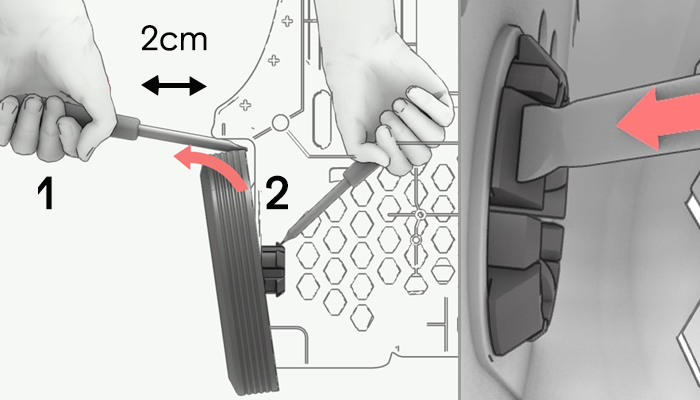
5. Bend the wheel and push in the 3 locking hooks
5.1 Use the first screwdriver to band the wheel approximately 2 cm out.
5.2 Use the second screwdriver to press in the locking hooks (A, B, C) while simultaneously bending the wheel outward. All locking tabs will eventually retract into the hole.
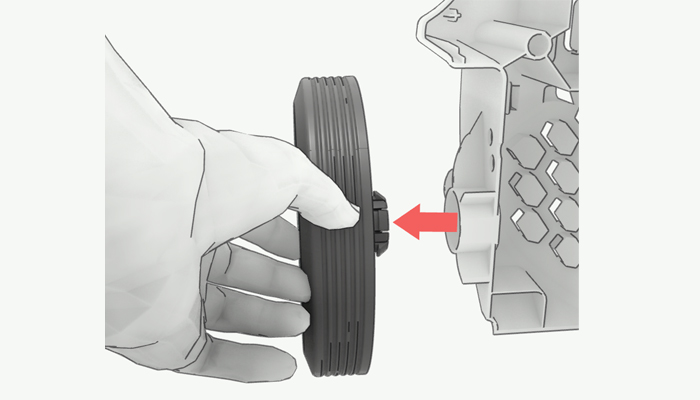
6. Pull the wheel out
Use your hand to level and pull the wheel until it loosens.
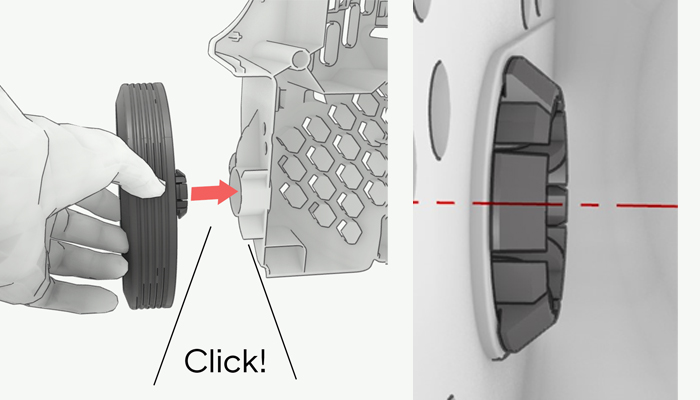
7. Installation of a new wheel
Press the new wheel into the hole until it clicks into place. When the wheel is in the correct position, you can see the locking hooks on the inside.
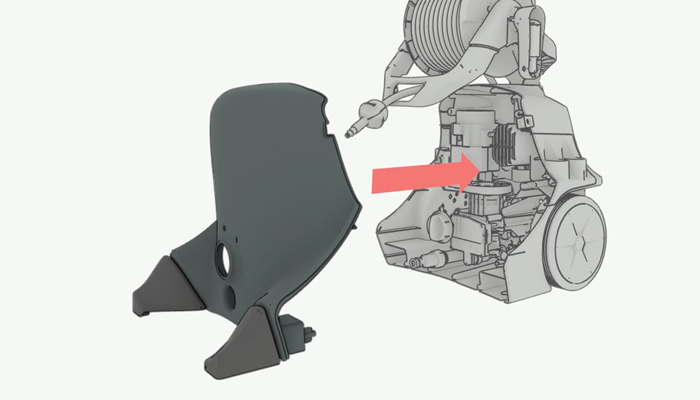
8. Replace the front cover
Check that the entire edge of the front cover is in place in the groove of the back cover.
9. Replace the 6 screws into the back cover
Use Torx 25 to fasten the screws.
