Step by step guide
Master: Replace hose & Swivel
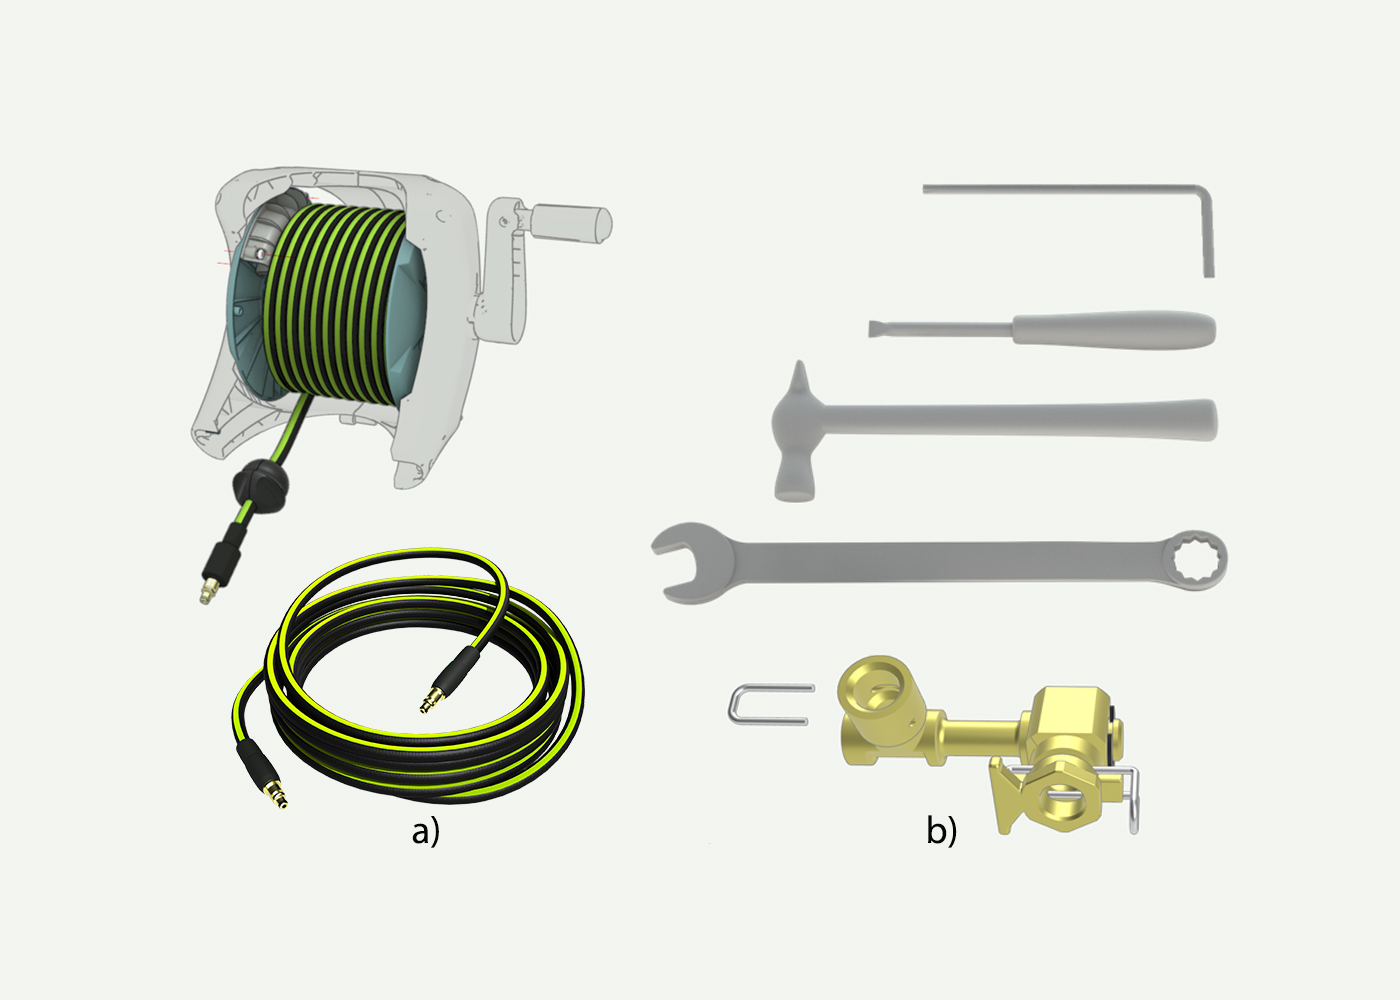
a) Steel Reinforced hose SKU: 11-120-405. b) Swivel SKU: 949-102-01
Safety first! To prevent any accidents, ensure that your pressure washer is turned off and unplugged from its power source This guide provides a detailed, step-by-step process for replacing the hose and swivel on your Master pressure washer. You'll learn to identify your swivel type, remove the reel wheel hose cover, disconnect the hose, install a Quick Connector Kit, and assemble the new parts. Safety tips and required tools are also outlined to ensure a smooth and secure replacement. If the hose is equipped with a female coupling, please see the following article for disassembling this coupling: ‘AVA Steel Reinforced Hose with Female Coupling.’
Learn how to replace the hose & swivel on your Master pressure washer with this step-by-step guide. All you need are Torx 25, one flathead screwdriver, or similar tools.
For replacing an new and old hose connection, you need Swivel kit UN02, a hammer, a size 21 wrench, or similar tools.
1. Old or new hose swivel? To determine whether you have a new or old swivel, you must first unwind the hose to see the swivel assembly
Pull the hose completely until all the hose is out of the reel, allowing you to see the swivel c).
A) A new swivel has a male quick connector with a corresponding female quick connector in brass.
B) An old swivel has an integrated hose joint in galvanized steel.
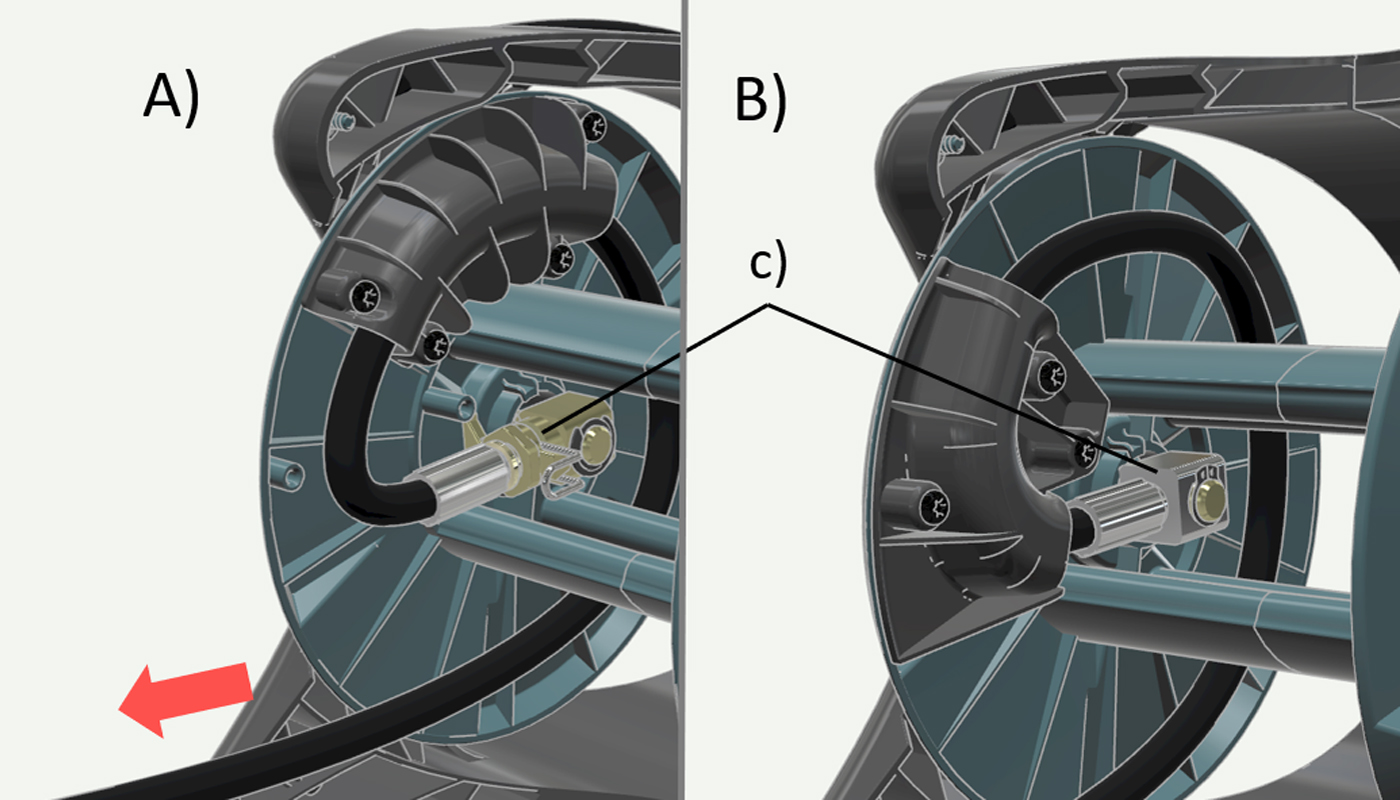
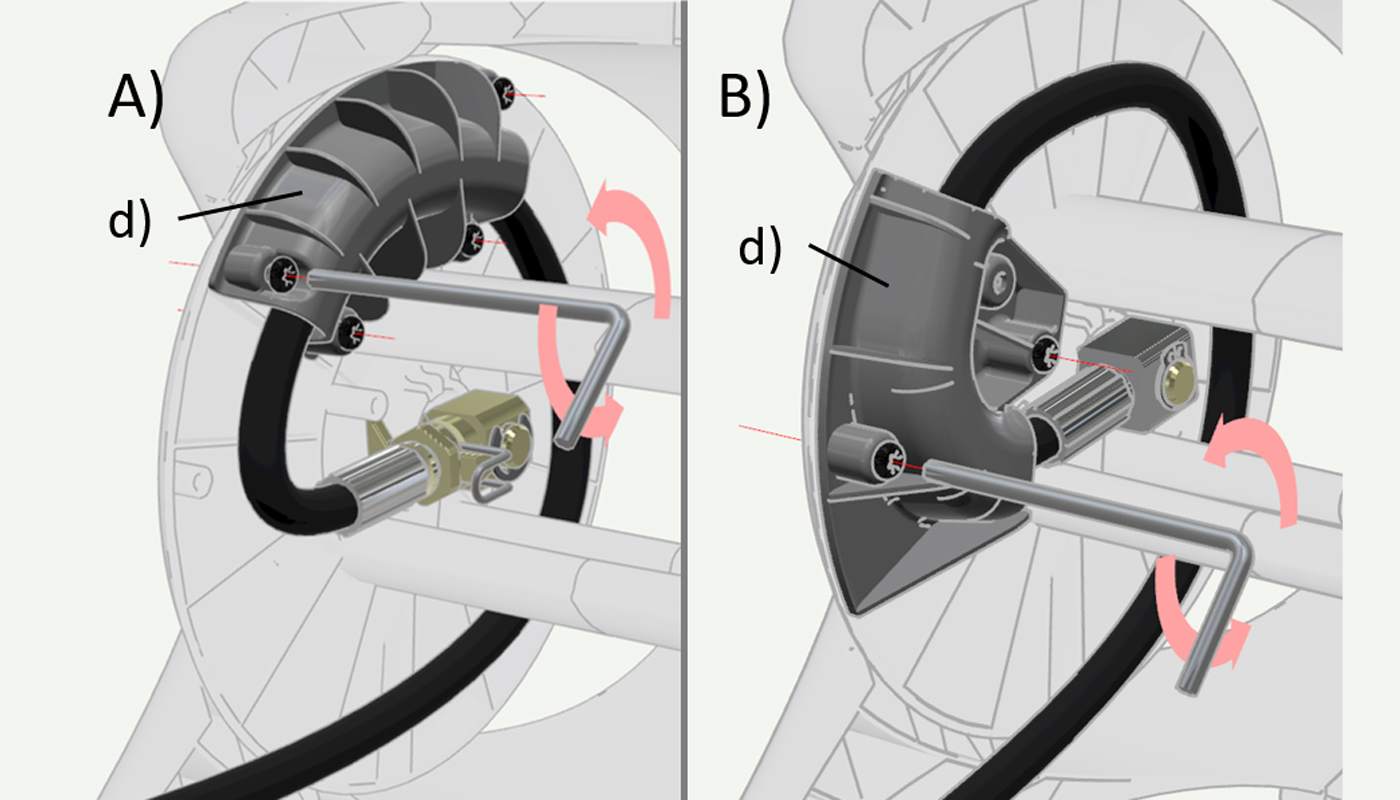
2. Remove Reel wheel hose cover d)
A) New Reel: Use Torx 25 to unscrew 4 screws.
B) Old Reel: Use Torx 25 to unscrew 2 screws.
3. Disconnect hose with new swivel
a) Push in the Quick connector spring.
b) Pull the hose while simultaneously pressing the Quick Connector spring.
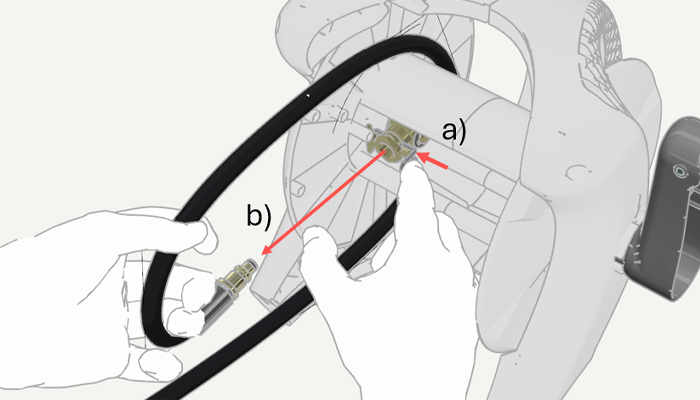
4. Disconnect the hose with old swivel
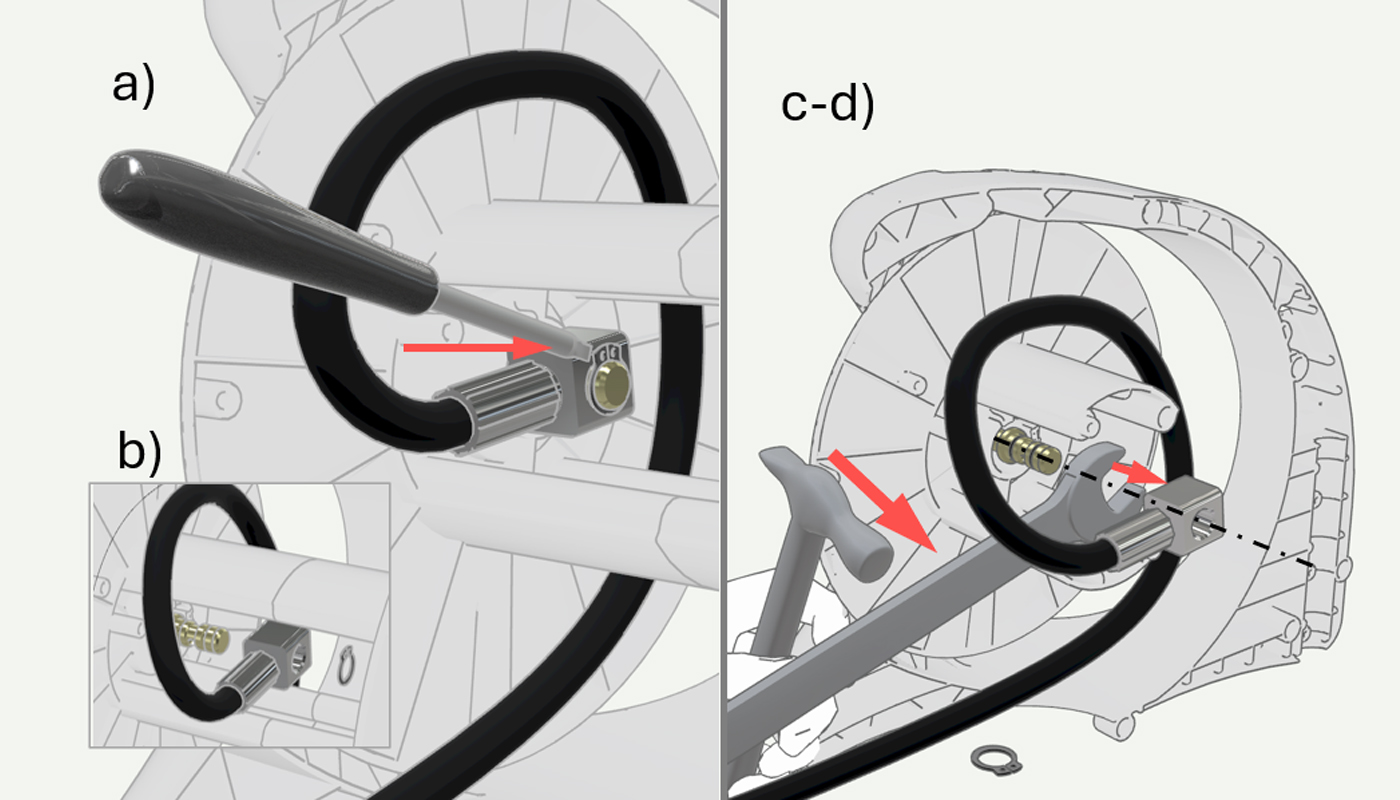
a) Use a flat screwdriver or special tool to loosen the C-Clip.
b) Pull the hose end off the swivel. An O-ring in the swivel may make it difficult to remove the hose end. In that case, do the following:
c) Place a wrench approx. size 21 or similar on the back of the swivel.
d) Tap on the wrench with a hammer or similar until the swivel loosens. The swivel must be as straight as possible to the swivel's axial direction. Check that the swivel hasn't been bent after the hose is disconnected.
Steps c-d can also be applied to a new machine if disassembling the swivel proves challenging.
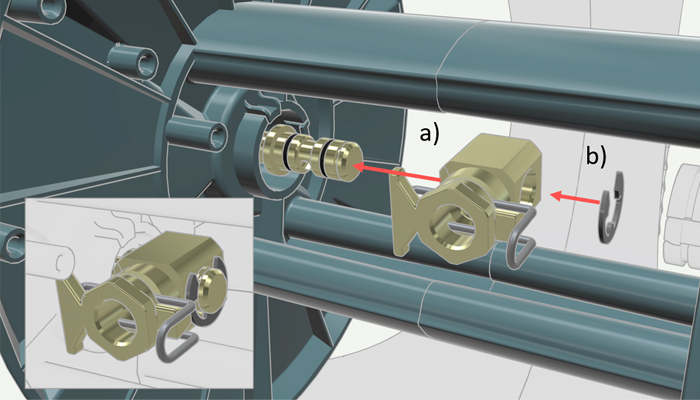
5. Install the Quick Connector Kit
a) Put the Quick Connector, onto the hose reel swivel. If the hose swivel is difficult to fit into place, use the wrench on the outside of the swivel and gently tap with a hammer until the hose swivel is in place. The hose swivel is in place when the groove for the E-clip is visible on the outside. If possible, apply a thin layer of acid-free Vaseline or equivalent to the swivel O-rings.
b)Secure the hose swivel by installing the E-clip into the groove.
NB. Inspect the O-rings before assembly. If they are visibly damaged, they must be replaced. You will find 2 O-rings in service kit 11-120-503.
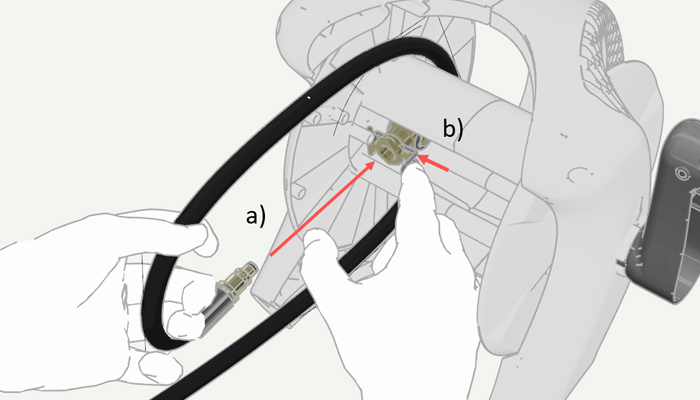
6. Install new Quick Connector Hose
a) Push the hose end into the Quick connector until it clicks in place.
b) If it is too hard to push, you can deactivate the locking system by pushing in the Quick connector spring. If possible, apply a thin layer of acid-free Vaseline or equivalent to the Quick connector O-ring.
7. Replace Swivel on new and old Reel
Start with step 8:
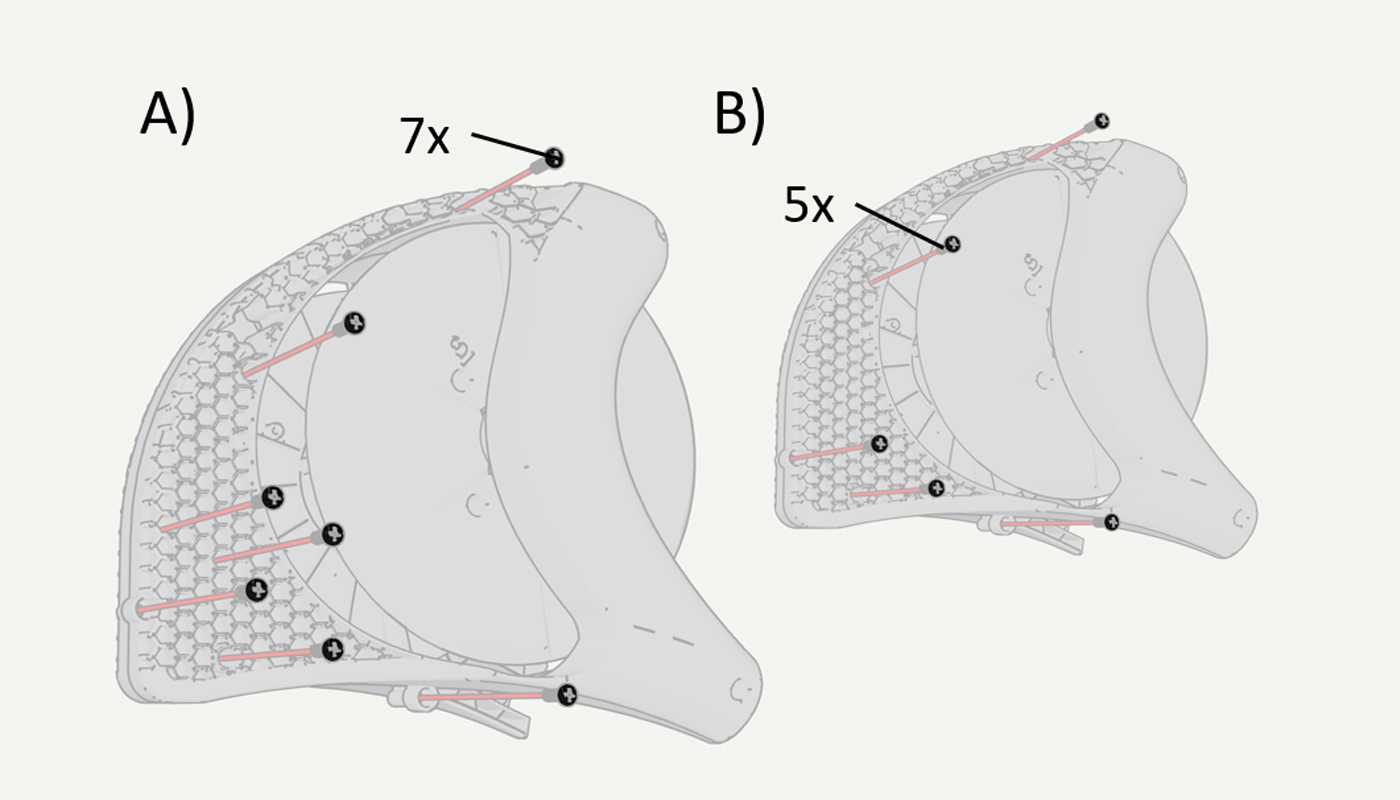
8. Remove Screws
A) New Reel: Unscrew 7 screws (Torx 25).
B) Old Reel: Unscrew 5 screws (Torx 25).
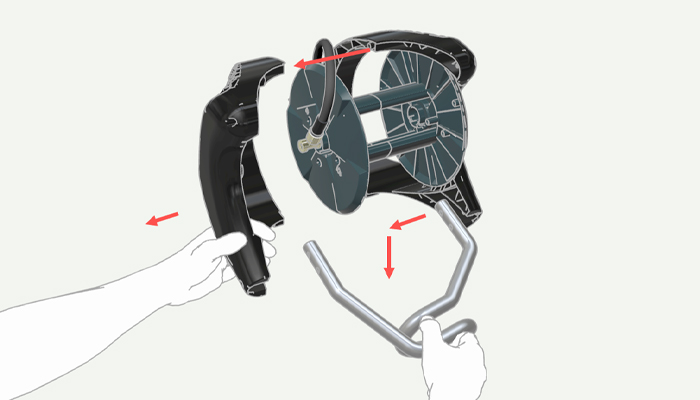
9. Open old Reel
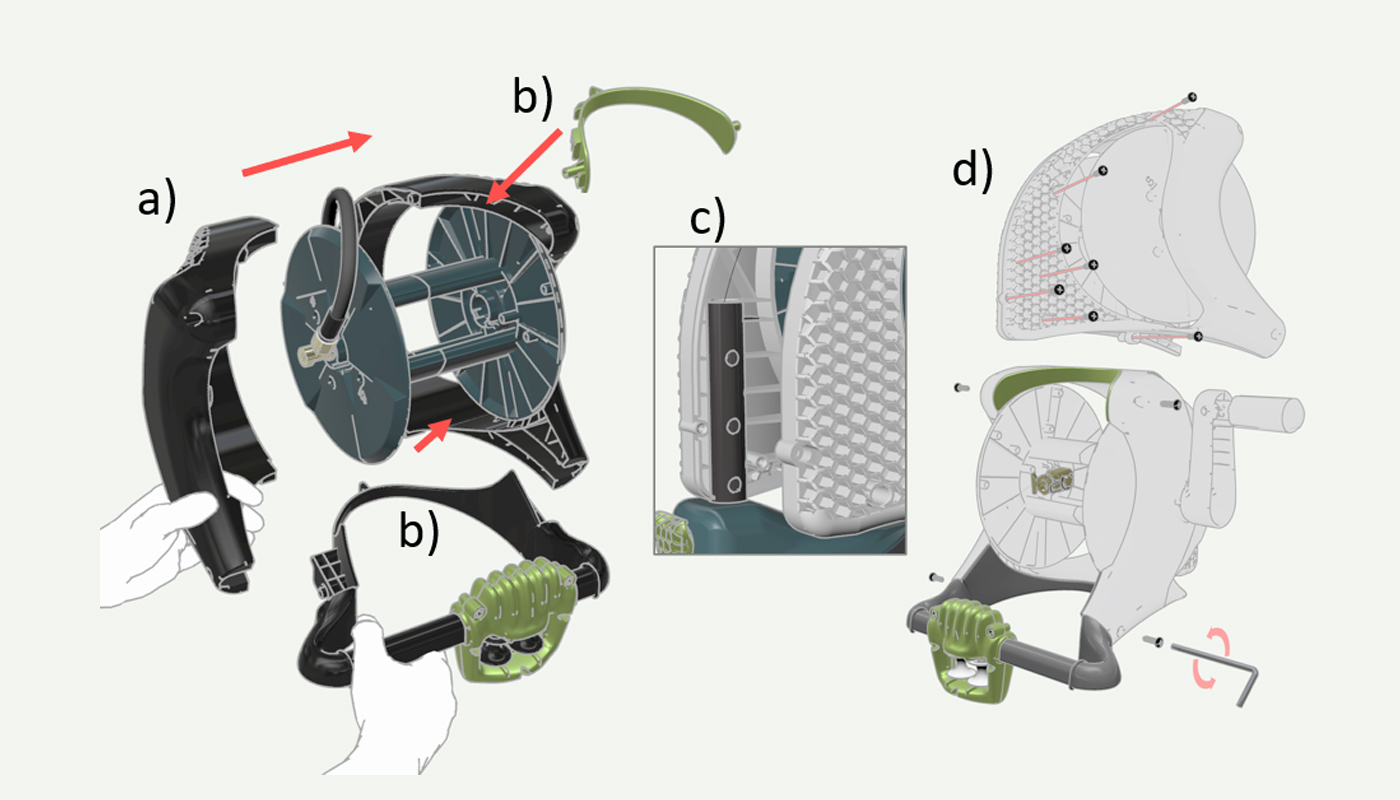
Pull the Left Reel Frame to the side and lift the hose Guide away.
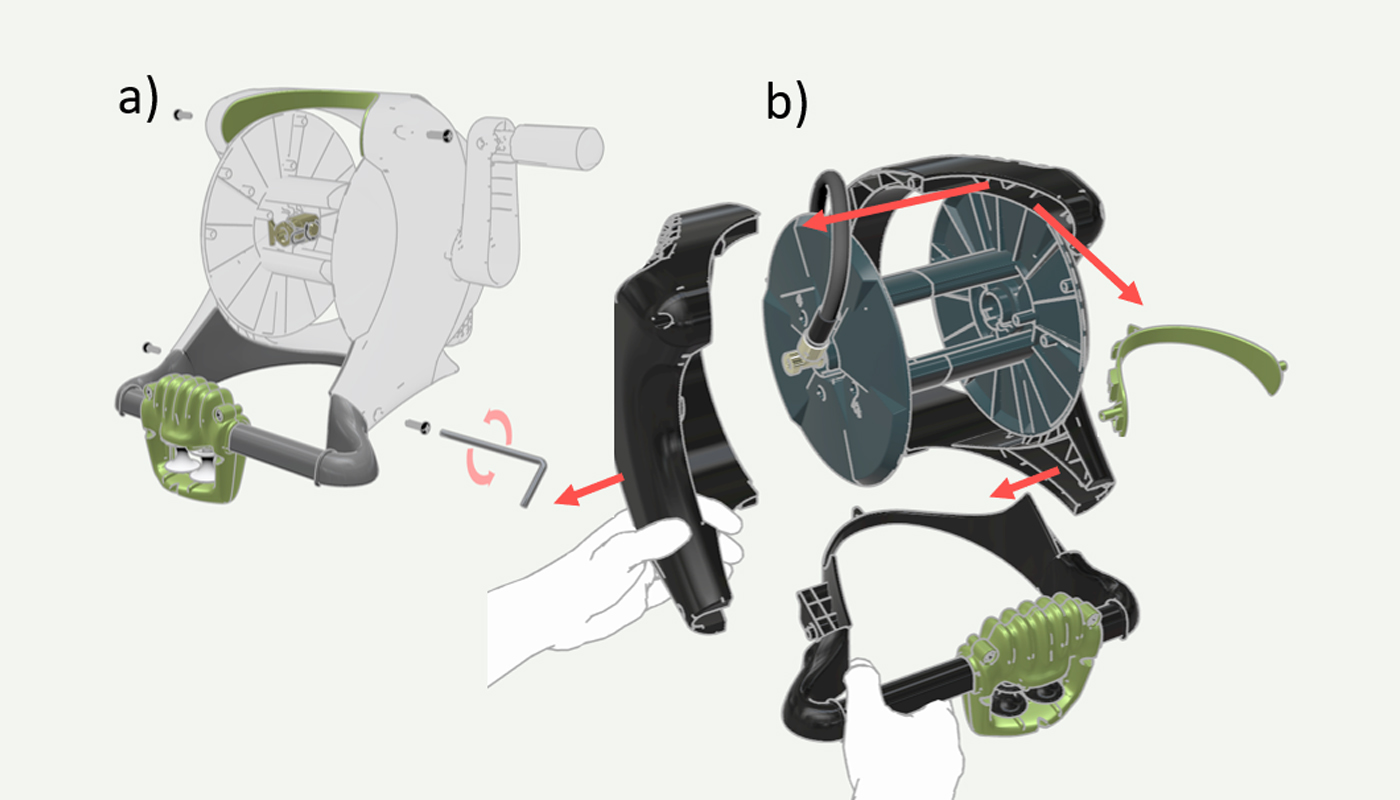
10. Open new Reel
a) Unscrew four screws (Torx 25).
b) Pull off the Left Reel Frame and lift away the hose guide and front cover.
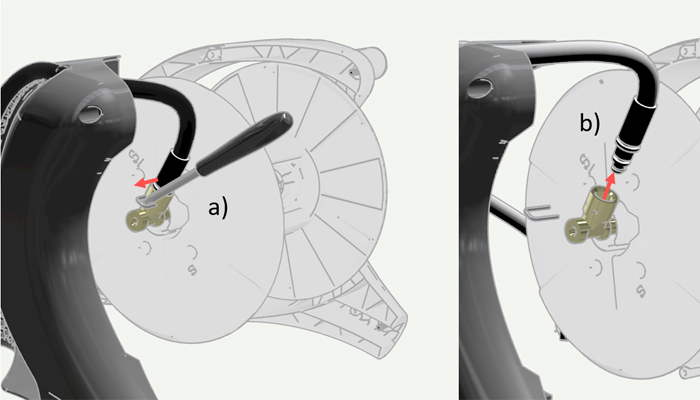
11. Disconnect the internal hose
a) Use a flat screwdriver to tilt out the U-Pin.
b) Pull the internal hose out of the swivel.
12. Remove swivel
Gently pull the swivel out of Reel.
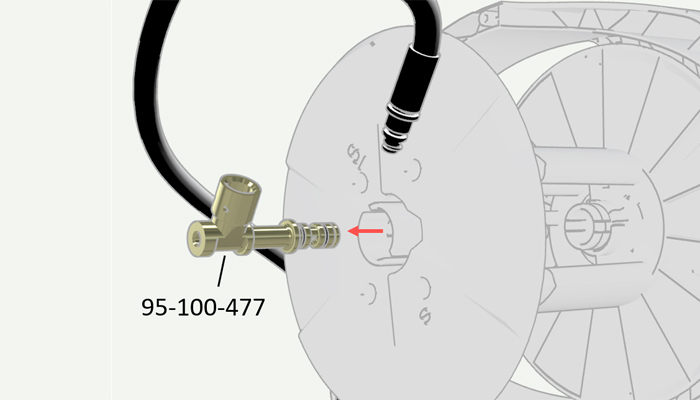
13. Install new swivel
a) Put the internal hose into the swivel.
b) Secure the internal hose with U-Pin.
c) Put Swivel into Reel
d) Assemble the Left Reel Frame with the Right Reel Frame.
e) Assemble the Quick Connector and Swivel.
f) Secure the swivel assembly with an E-Clip.

14. Assemble old reel
a) Put the hose guide into the grove on the Right Reel Frame
b) Put the Left Reel Frame together with the Right Reel Frame. Make sure that the Hose guide fits into it belonging grooves.
c) Install 5 screws (Torx 25).
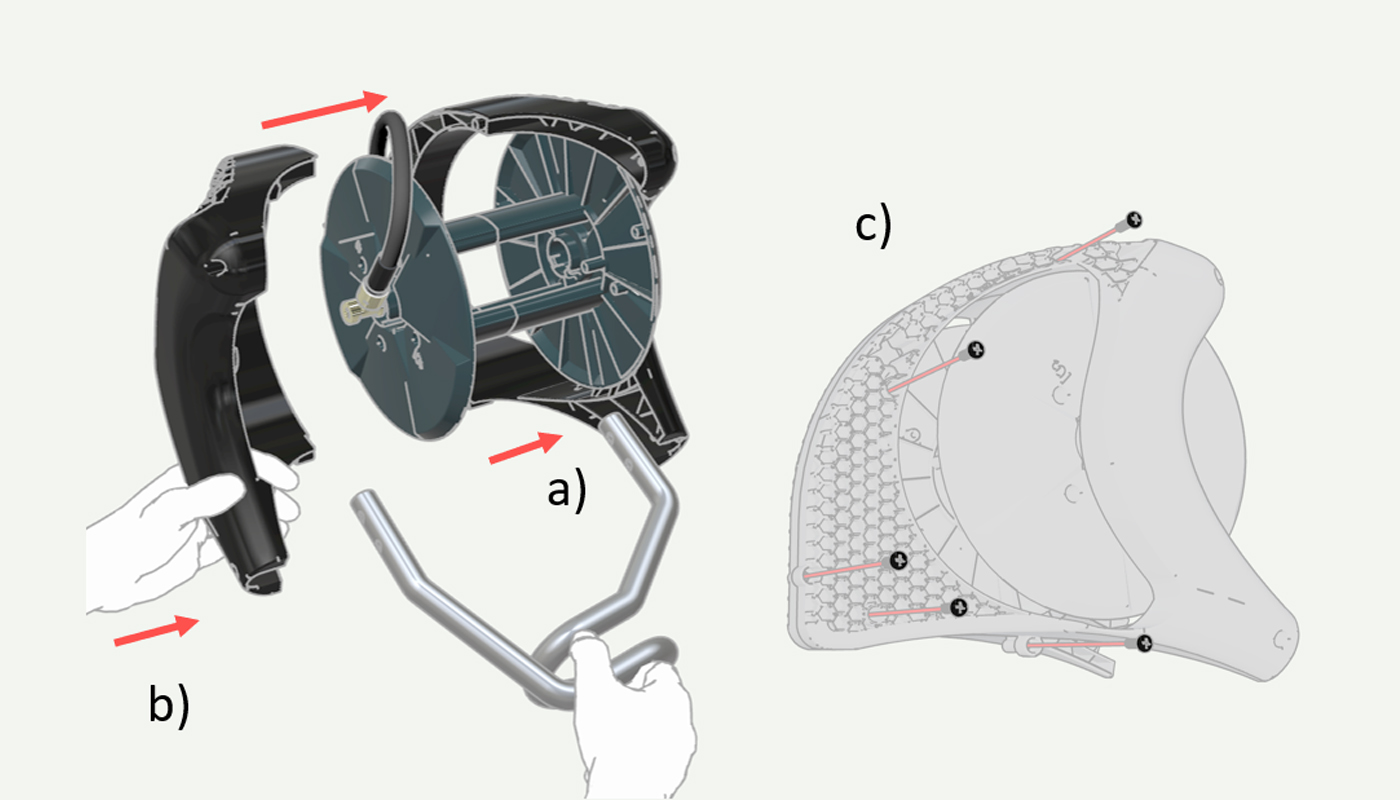
15. Assemble new reel
a) Assemble the left Reel Frame with the Right Reel Frame. Make sure that the swivel is placed in its belonging groove.
b) Place the hose guide and front cover inside the Reel frame.
c) Make sure that the aluminium pipe is placed in its grooves inside the Reel Frame.
d) Install all 11 screws screws (Torx 25).
